Hi,
Welcome to my blog. In this post we will see how to achieve Impersonation in WCF ( Windows Communication Foundation). In this we will see both WCF SOAP and REST services.
Overview:
.NET Remoting provides Impersonation easily which helps us in passing clients credentials to server side. In this article we will see how we can achieve impersonation in WCF for both SOAP and REST calls. I tried a lot of online resources basically everybody said same and no matter what I tried they did not. They just post the code and say it worked. The challenges increased when I was using REST calls. So here I want to have the code ( mostly configuration ) that I used to solve Impersonation issue at one place so that needy can use this.
Introduction:
Simply to say impersonation is a technique that is used to pass client credentials ( like username ) to server side. Normally, clients call a service to perform some action by server on client’s behalf. This article is not an exhaustive tutorial about developing WCF services and calling them. It assumes that the reader has some basic knowledge about WCF creation and calling service methods. This article is written for C# code.
Now let's start our work
For this article, I am using the following tools/technologies to develop a my sample application
Visual Studio 2015
C#
.NET Framework 4.5
SOAP:
First lets see how to achieve impersonation in WCF SOAP service.
WCF Service:
Create a solution and Add new WCF service library project
1. Add using System.Security.Principal at top in service implementation file.
2.Set the impersonation required on the operation implementation of the specific operations as follows:
[OperationBehavior(Impersonation = ImpersonationOption.Required)]
public void GetData()
{
// code goes here
}
Service Host Configuration:
In service host application configuration file you need to have bindings and use those bindings in service endpoints like below. In below we have basicHttpBinding and wsHttpBinding bindings
<basicHttpBinding>
<binding name="basicHttpBindingConfiguration" maxBufferSize="2147483647"
maxBufferPoolSize="2147483647" maxReceivedMessageSize="2147483647">
<readerQuotas maxDepth="2147483647" maxStringContentLength="2147483647"
maxArrayLength="2147483647" maxBytesPerRead="2147483647"
maxNameTableCharCount="2147483647" />
<security mode="TransportCredentialOnly">
<transport clientCredentialType="Windows" proxyCredentialType="None" realm="" />
<message clientCredentialType="UserName" algorithmSuite="Default" />
</security>
</binding>
</basicHttpBinding>
<wsHttpBinding>
<binding name="wsHttpBindingConfiguration" maxBufferPoolSize="2147483647"
maxReceivedMessageSize="2147483647" messageEncoding="Text" textEncoding="utf-8"
useDefaultWebProxy="true" allowCookies="false">
<readerQuotas maxDepth="2147483647" maxStringContentLength="2147483647"
maxArrayLength="2147483647" maxBytesPerRead="2147483647"
maxNameTableCharCount="2147483647"></readerQuotas>
<reliableSession ordered="true" inactivityTimeout="00:20:00" enabled="false"></reliableSession>
<security mode="Message">
<transport clientCredentialType="Windows" proxyCredentialType="None" realm="" />
<message clientCredentialType="Windows" negotiateServiceCredential="true" algorithmSuite="Default" establishSecurityContext="true" />
</security>
</binding>
</wsHttpBinding>
Next use above binding in service endpoints
<service behaviorConfiguration="documentWCFServiceBehavior"
name="AMF.Document.Server.WCF.Service.DocumentWCFService">
<endpoint address="/basic" binding="basicHttpBinding" bindingConfiguration="basicHttpBindingConfiguration"
name="basicHttpEndpoint" contract="AMF.Document.Server.WCF.Service.IDocumentWCFService" />
<endpoint address="/ws" binding="wsHttpBinding" bindingConfiguration="wsHttpBindingConfiguration"
name="wsHttpEndpoint" contract="AMF.Document.Server.WCF.Service.IDocumentWCFService" />
<endpoint address="mex" binding="mexHttpBinding" name="mexEndpoint" contract="IMetadataExchange" />
<host>
<baseAddresses>
<add baseAddress="http://localhost:2022/DocumentWCFService" />
</baseAddresses>
</host>
</service>
Please see below for full configuration file for WCF service host.
<?xml version="1.0" encoding="utf-8" ?>
<configuration>
<startup>
<supportedRuntime version="v4.0" sku=".NETFramework,Version=v4.5" />
</startup>
<system.serviceModel>
<bindings>
<basicHttpBinding>
<binding name="basicHttpBindingConfiguration" maxBufferSize="2147483647" maxBufferPoolSize="2147483647" maxReceivedMessageSize="2147483647">
<readerQuotas maxDepth="2147483647" maxStringContentLength="2147483647"
maxArrayLength="2147483647" maxBytesPerRead="2147483647"
maxNameTableCharCount="2147483647" />
<security mode="TransportCredentialOnly">
<transport clientCredentialType="Windows" proxyCredentialType="None" realm="" />
<message clientCredentialType="UserName" algorithmSuite="Default" />
</security>
</binding>
</basicHttpBinding>
<wsHttpBinding>
<binding name="wsHttpBindingConfiguration" maxBufferPoolSize="2147483647" maxReceivedMessageSize="2147483647"
messageEncoding="Text" textEncoding="utf-8" useDefaultWebProxy="true" allowCookies="false">
<readerQuotas maxDepth="2147483647" maxStringContentLength="2147483647"
maxArrayLength="2147483647" maxBytesPerRead="2147483647"
maxNameTableCharCount="2147483647"></readerQuotas>
<reliableSession ordered="true" inactivityTimeout="00:20:00" enabled="false"></reliableSession>
<security mode="Message">
<transport clientCredentialType="Windows" proxyCredentialType="None" realm="" />
<message clientCredentialType="Windows" negotiateServiceCredential="true" algorithmSuite="Default" establishSecurityContext="true" />
</security>
</binding>
</wsHttpBinding>
</bindings>
<behaviors>
<serviceBehaviors>
<behavior name="defaultServiceBehavior">
<serviceMetadata httpGetEnabled="true" httpGetUrl="" httpsGetEnabled="false"/>
<serviceDebug includeExceptionDetailInFaults="true"/>
</behavior>
</behaviors>
<services>
<service behaviorConfiguration="defaultServiceBehavior" name="MyService">
<endpoint address="/basic" binding="basicHttpBinding" bindingConfiguration="basicHttpBindingConfiguration"
name="basicHttpEndpoint" contract="IMyService" />
<endpoint address="/ws" binding="wsHttpBinding" bindingConfiguration="wsHttpBindingConfiguration"
name="wsHttpEndpoint" contract="IMyService">
</endpoint>
<endpoint address="mex" binding="mexHttpBinding" name="mexEndpoint"
contract="IMetadataExchange" />
<host>
<baseAddresses>
<add baseAddress="http://localhost:8000/MyService" />
</baseAddresses>
</host>
</service>
</services>
</system.serviceModel>
</configuration>
Client:
This article doesnot cover how add SOAP service reference. This article assumes reader already has knowledge of how to do it. Once you add servie reference at client, the client's configuration file is updated with service information. Make sure you have security information like below
<bindings>
<basicHttpBinding>
<binding name="basicHttpEndpoint" maxBufferSize="2147483647" maxBufferPoolSize="2147483647"
maxReceivedMessageSize="2147483647">
<readerQuotas maxDepth="2147483647" maxStringContentLength="2147483647"
maxArrayLength="2147483647" maxBytesPerRead="2147483647"
maxNameTableCharCount="2147483647" />
<security mode="TransportCredentialOnly">
<transport clientCredentialType="Windows" />
</security>
</binding>
</basicHttpBinding>
<wsHttpBinding>
<binding name="wsHttpEndpoint" maxBufferPoolSize="2147483647" maxReceivedMessageSize="2147483647"
messageEncoding="Text" textEncoding="utf-8" useDefaultWebProxy="true" allowCookies="false">
<readerQuotas maxDepth="2147483647" maxStringContentLength="2147483647"
maxArrayLength="2147483647" maxBytesPerRead="2147483647"
maxNameTableCharCount="2147483647"></readerQuotas>
</binding>
</wsHttpBinding>
</bindings>
The configuration file be like below
<?xml version="1.0" encoding="utf-8"?>
<configuration>
<system.serviceModel>
<bindings>
<basicHttpBinding>
<binding name="basicHttpEndpoint" maxBufferSize="2147483647" maxBufferPoolSize="2147483647" maxReceivedMessageSize="2147483647">
<readerQuotas maxDepth="2147483647" maxStringContentLength="2147483647"
maxArrayLength="2147483647" maxBytesPerRead="2147483647"
maxNameTableCharCount="2147483647" />
<security mode="TransportCredentialOnly">
<transport clientCredentialType="Windows" />
</security>
</binding>
</basicHttpBinding>
<wsHttpBinding>
<binding name="wsHttpEndpoint" maxBufferPoolSize="2147483647" maxReceivedMessageSize="2147483647"
messageEncoding="Text" textEncoding="utf-8" useDefaultWebProxy="true" allowCookies="false">
<readerQuotas maxDepth="2147483647" maxStringContentLength="2147483647"
maxArrayLength="2147483647" maxBytesPerRead="2147483647"
maxNameTableCharCount="2147483647"></readerQuotas>
</binding>
</wsHttpBinding>
</bindings>
<client>
<endpoint address="http://localhost:8000/MyService/basic"
binding="basicHttpBinding" bindingConfiguration="basicHttpEndpoint"
contract="IMyService" name="basicHttpEndpoint" />
<endpoint address="http://localhost:8000/MyService/ws"
binding="wsHttpBinding" bindingConfiguration="wsHttpEndpoint"
contract="IMyService" name="wsHttpEndpoint">
</endpoint>
</client>
</system.serviceModel>
<startup>
<supportedRuntime version="v4.0" sku=".NETFramework,Version=v4.5"/>
</startup>
</configuration>
Below is sample code to call service methods
// endpoint configurations. See client app.config
string configurationName = "basicHttpEndpoint";
//configurationName = "wsHttpEndpoint";
//MyServiceRef is service reference name
//create service client
MyServiceRef.MyServiceClient client = new MyServiceRef.MyServiceClient(configurationName);
//set impersonation level
client.ClientCredentials.Windows.AllowedImpersonationLevel = System.Security.Principal.TokenImpersonationLevel.Impersonation;
//call service method
client.GetData();
REST:
Now lets see how to achieve impersonation in Restful WCF service.
WCF Service:
Create a solution and Add new WCF service library project
1. Add using System.Security.Principal at top in service implementation file.
2.Set the impersonation required on the operation implementation of the specific operations as follows:
[OperationBehavior(Impersonation = ImpersonationOption.Required)]
public void GetData()
{
// code goes here
}
Interface for above will be like below
[Description("Gets all unprinted items.")]
[OperationContract]
[WebInvoke(
Method = "POST",
UriTemplate = "/getdata",
BodyStyle = WebMessageBodyStyle.Bare,
RequestFormat = WebMessageFormat.Json,
ResponseFormat = WebMessageFormat.Json
)]
void GetData();
Service Host Configuartion:
In service host application configuration file you need to have bindings and use those bindings in service endpoints like below
<webHttpBinding>
<binding name="webHttpBindingConfiguration" maxBufferSize="2147483647" maxBufferPoolSize="2147483647"
maxReceivedMessageSize="2147483647">
<readerQuotas maxDepth="2147483647" maxStringContentLength="2147483647"
maxArrayLength="2147483647" maxBytesPerRead="2147483647"
maxNameTableCharCount="2147483647" />
<security mode="TransportCredentialOnly">
<transport clientCredentialType="Windows"/>
</security>
</binding>
</webHttpBinding>
Next use above binding in service endpoints
<service behaviorConfiguration="MyRESTServiceBehavior"
name="MyRESTService">
<endpoint address=""
behaviorConfiguration="webBehaviorConfiguration" binding="webHttpBinding"
bindingConfiguration="webHttpBindingConfiguration"
contract="IMyRESTService" />
<host>
<baseAddresses>
<add baseAddress="http://localhost:8000/IMyRESTService" />
</baseAddresses>
</host>
<endpoint address="mex" binding="webHttpBinding" contract="IMetadataExchange"
bindingConfiguration="webHttpBindingConfiguration" />
</service>
Please see below for full configuration file for WCF service host.
<?xml version="1.0" encoding="utf-8" ?>
<configuration>
<startup>
<supportedRuntime version="v4.0" sku=".NETFramework,Version=v4.5" />
</startup>
<system.serviceModel>
<bindings>
<webHttpBinding>
<binding name="webHttpBindingConfiguration" maxBufferSize="2147483647" maxBufferPoolSize="2147483647"
maxReceivedMessageSize="2147483647">
<readerQuotas maxDepth="2147483647" maxStringContentLength="2147483647"
maxArrayLength="2147483647" maxBytesPerRead="2147483647"
maxNameTableCharCount="2147483647" />
<security mode="TransportCredentialOnly">
<transport clientCredentialType="Windows"/>
</security>
</binding>
</webHttpBinding>
</bindings>
<behaviors>
<serviceBehaviors>
<behavior name="myRESTServiceBehavior">
<!-- To avoid disclosing metadata information,
set the values below to false before deployment -->
<serviceMetadata httpGetEnabled="true" httpGetUrl="" httpsGetEnabled="false"/>
<!-- To receive exception details in faults for debugging purposes,
set the value below to true. Set to false before deployment
to avoid disclosing exception information -->
<serviceDebug includeExceptionDetailInFaults="False" />
<!--<serviceCredentials>
<windowsAuthentication allowAnonymousLogons="false" includeWindowsGroups="true"/>
</serviceCredentials>-->
</behavior>
<endpointBehaviors>
<behavior name="webBehaviorConfiguration">
<webHttp />
</behavior>
</endpointBehaviors>
</behaviors>
<services>
<service behaviorConfiguration="MyRESTServiceBehavior"
name="MyRESTService">
<endpoint address=""
behaviorConfiguration="webBehaviorConfiguration" binding="webHttpBinding"
bindingConfiguration="webHttpBindingConfiguration"
contract="IMyRESTService" />
<host>
<baseAddresses>
<add baseAddress="http://localhost:8000/IMyRESTService" />
</baseAddresses>
</host>
<endpoint address="mex" binding="webHttpBinding" contract="IMetadataExchange"
bindingConfiguration="webHttpBindingConfiguration" />
</service>
</services>
</system.serviceModel>
</configuration>
Client:
Rest service will not have any service references. The RESTful service methods can be called like below
string url = "http://localhost:8000/IMyRESTService/getdata";
HttpWebRequest request = (HttpWebRequest)WebRequest.Create(url);
request.UseDefaultCredentials = true;
request.Method = "GET";
request.ContentType = "application/json";
System.Security.Principal.WindowsIdentity windowsIdentity = System.Security.Principal.WindowsIdentity.GetCurrent();
using(windowsIdentity.Impersonate())
{
request.ImpersonationLevel = System.Security.Principal.TokenImpersonationLevel.Impersonation;
WebResponse response = request.GetResponse();
Stream respStream = response.GetResponseStream();
StreamReader reader = new StreamReader(respStream);
string responseData = reader.ReadToEnd();
}
Conclusion:
In this article how we can implement impersonation for WCF service for both SOAP and REST calls.
We saw what entries we need to have in configuration files of service host and client applications and how to set impersonation level and call service methods.
I hope you enjoyed reading this post as much as I did while writing it. Please feel free to let me know your valuable and constructive comments and suggestions which can help me to make this article better and improve my technical and written skills. Last but not the least please excuse me for my grammar and typos.
Thanks and have a nice and wonderful day.
Monday, February 11, 2019
Wednesday, June 28, 2017
Step By Step : Excel-DNA, C#, Excel User Defined Functions
Hi,
Welcome to my blog of Excel DNA using Visual Studio and C#. In this post we will see how to
create Excel User Defined Functions ( UDFs ) using Visual Studio and C# by using Excel-DNA.
Introduction:
As per https://excel-dna.net/, Excel-DNA is an independent project to provide high-performance user-defined functions ( UDFs ), create custom ribbon bar and more to your Excel sheet. It allows to develop native .xll add-ins for Excel using C#, VB.NET, F#. It helps to integrate .NET into Excel.
Prerequisites:
Since we are integrating .NET into Excel we need Visual Studio. We can get Visual Studio 2015 Community Edition for free at https://beta.visualstudio.com/downloads/.
Once you install Visual Studio you are ready to go. So let's dig in and see step-by-step guide of creating a user-defined function ( UDF ) and execute that in Excel.
Create Project:
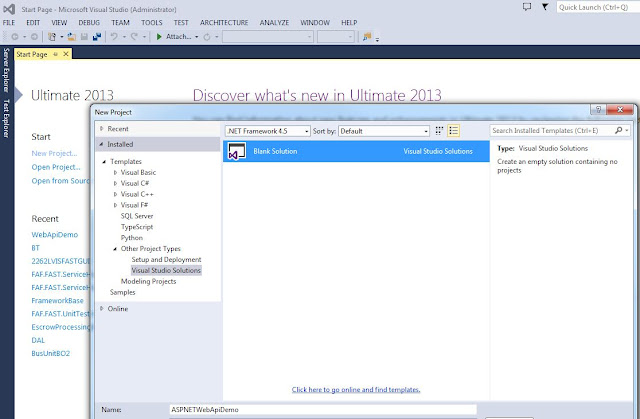
Launch Visual Studio. You need to create a Class Library Project. You can create by going to
File -> New -> Project and select Visual C# and then select Class Library project and give it a name like MyExcelDNALibrary. Please see below

This creates a new solution for you like below

Next step you need to do is add Excel-DNA add-in to your class library project. This can be done using NuGet Package Manager ( this is included in most of the recent visual studio versions).
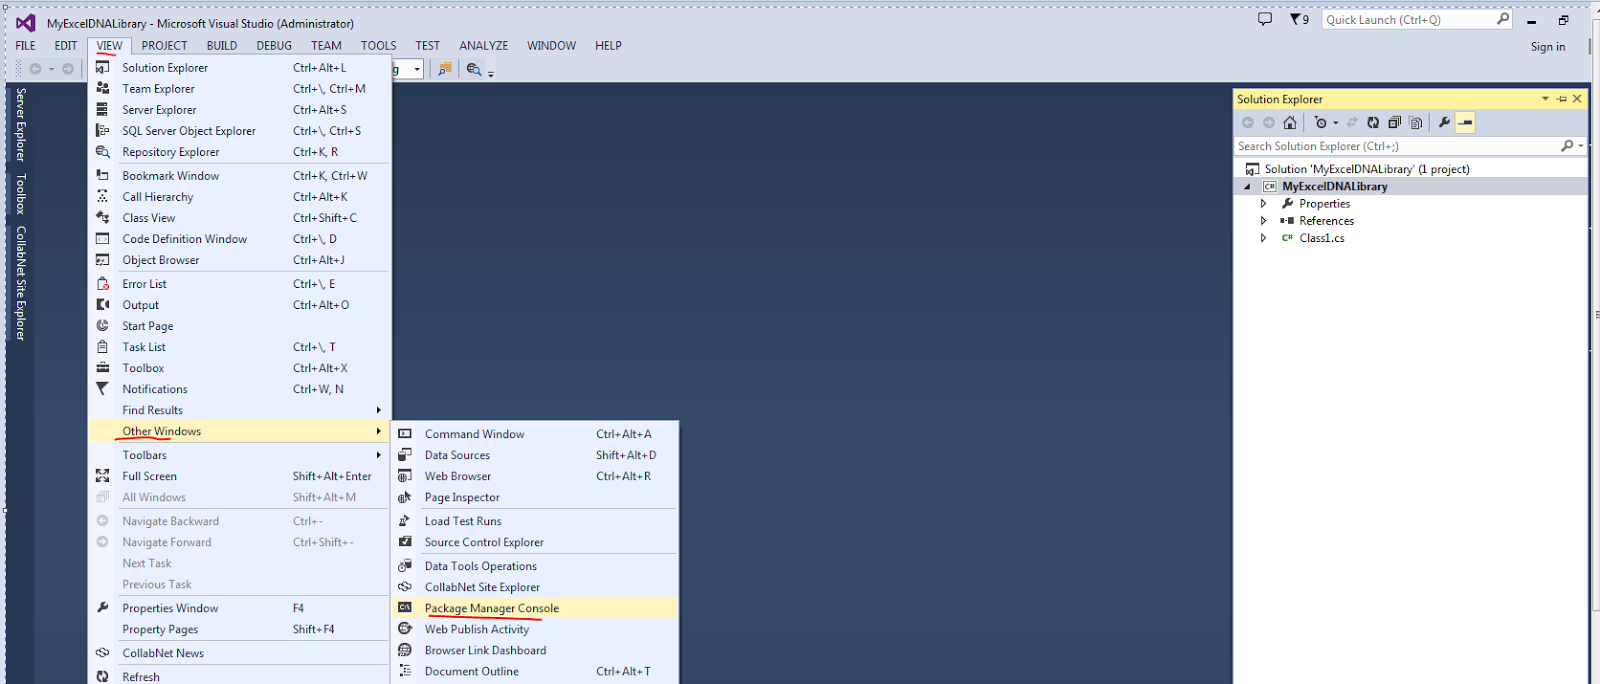
In your Visual Studio, go to View menu at the top and the Other Windows and select Package Manager Console. This will open Package Manager Console pane. Please see below


Note : In Package Manager Console make sure you select the correct project under default project dropdown. In above image the red circled one.
Give the following command next to PM> in Package Manager Console and press Enter
Install-Package Excel-DNA.
You will get a bunch of text successful and complete messages and Excel-DNA add-in will
be added to your project.

Now your Solution Explorer must look like below

This step is optional. Open Solution Explorer and right click on Class1.cs and then select Rename to rename class to UDFHelper.

Now double click above class to open it and give using ExcelDna.Integration; at the top. Your class must look like below

To make things simple, let's add a function that gets current date and time like below
[ExcelFunction(Name = "CURRENTDATETIME")]
public static DateTime CurrentDateTime()
{
return DateTime.Now;
}
Lets also add a function that adds 2 numbers and returns result
[ExcelFunction(Name = "ADDTWONUMBERS")]
public static int Add(int a , int b)
{
return a + b;
}
Now your class must look like below

ExcelFunction tells that the function must be exposed in Excel as work sheet function.
[ExcelFunction(Name = "CURRENTDATETIME")] tells that .NET C# CurrentDateTime function must be exposed in Excel as CURRENTDATETIME.
[ExcelFunction(Name = "ADDTWONUMBERS")] tells that .NET C# Add function must be exposed in Excel as ADDTWONUMBERS.
In Solution Explorer right-click on your Excel-DNA Class Library project and select Properties. This will open properties tab. Go to Debug and make sure you have Excel.exe location
for Start external program. In my case it was C:\Program Files (x86)\Microsoft Office\Office14\EXCEL.EXE
If you have 32-bit Excel then you can skip below steps and go directly to testing. If you have 64-bit Excel please follow bekow steps.
64-bit Excel:
In Solution Explorer right-click on your Excel-DNA Class Library project and select Properties. This will open properties tab. Go to Debug.

In Command line arguments : add 64 before .xll for example "MyExcelDNALibrary-AddIn64.xll" like below. This will tell that 64-bit version XLL will be loaded in Excel when you debug the application else you will get error

Test:
We are now ready to test. In Visual Studio, in command bar make sure you select Debug and then click on the green triangle to run the project or else press F5 on keyboard to run application.

If you donot have any compile errors, your solution will be compiled and Excel-DNA creates few xll files. Excel should be launched and depending on your security settings it will ask whether
to enable the add-in. Just select Enable button. This will open your Excel session.

Select a cell in excel and give =CURRENTDATETIME() like below. ( If everything goes fine Excel intellisense will show the method like below).

Select method like below to see result.

In order to format cell, select cell and right-click and follow below


Now you must see sensible date like below

To use Add follow below


Conclusion :
In this article we saw how we can create user defined functions (UDFs) and use them in Excel using Excel-DNA add-in. We created functions using .NET and C#. In future post I will show you how to create custom ribbon bar in Excel and how we can add buttons to it and perform some functionality like open a web-browser and launch a sample page. Till then I hope you find this post useful.
I hope you enjoyed reading this post as much as I did while writing it. Please feel free to let me know your valuable and constructive comments and suggestions which can help me to make this article better and improve my technical and written skills. Last but not the least please excuse me for my grammar and typos.
Thanks and have a nice and wonderful day.
Welcome to my blog of Excel DNA using Visual Studio and C#. In this post we will see how to
create Excel User Defined Functions ( UDFs ) using Visual Studio and C# by using Excel-DNA.
Introduction:
As per https://excel-dna.net/, Excel-DNA is an independent project to provide high-performance user-defined functions ( UDFs ), create custom ribbon bar and more to your Excel sheet. It allows to develop native .xll add-ins for Excel using C#, VB.NET, F#. It helps to integrate .NET into Excel.
Prerequisites:
Since we are integrating .NET into Excel we need Visual Studio. We can get Visual Studio 2015 Community Edition for free at https://beta.visualstudio.com/downloads/.
Once you install Visual Studio you are ready to go. So let's dig in and see step-by-step guide of creating a user-defined function ( UDF ) and execute that in Excel.
Create Project:
Launch Visual Studio. You need to create a Class Library Project. You can create by going to
File -> New -> Project and select Visual C# and then select Class Library project and give it a name like MyExcelDNALibrary. Please see below

This creates a new solution for you like below

Next step you need to do is add Excel-DNA add-in to your class library project. This can be done using NuGet Package Manager ( this is included in most of the recent visual studio versions).
In your Visual Studio, go to View menu at the top and the Other Windows and select Package Manager Console. This will open Package Manager Console pane. Please see below

Note : In Package Manager Console make sure you select the correct project under default project dropdown. In above image the red circled one.
Give the following command next to PM> in Package Manager Console and press Enter
Install-Package Excel-DNA.
You will get a bunch of text successful and complete messages and Excel-DNA add-in will
be added to your project.

Now your Solution Explorer must look like below

This step is optional. Open Solution Explorer and right click on Class1.cs and then select Rename to rename class to UDFHelper.

Now double click above class to open it and give using ExcelDna.Integration; at the top. Your class must look like below

To make things simple, let's add a function that gets current date and time like below
[ExcelFunction(Name = "CURRENTDATETIME")]
public static DateTime CurrentDateTime()
{
return DateTime.Now;
}
Lets also add a function that adds 2 numbers and returns result
[ExcelFunction(Name = "ADDTWONUMBERS")]
public static int Add(int a , int b)
{
return a + b;
}
Now your class must look like below

ExcelFunction tells that the function must be exposed in Excel as work sheet function.
[ExcelFunction(Name = "CURRENTDATETIME")] tells that .NET C# CurrentDateTime function must be exposed in Excel as CURRENTDATETIME.
[ExcelFunction(Name = "ADDTWONUMBERS")] tells that .NET C# Add function must be exposed in Excel as ADDTWONUMBERS.
In Solution Explorer right-click on your Excel-DNA Class Library project and select Properties. This will open properties tab. Go to Debug and make sure you have Excel.exe location
for Start external program. In my case it was C:\Program Files (x86)\Microsoft Office\Office14\EXCEL.EXE
If you have 32-bit Excel then you can skip below steps and go directly to testing. If you have 64-bit Excel please follow bekow steps.
64-bit Excel:
In Solution Explorer right-click on your Excel-DNA Class Library project and select Properties. This will open properties tab. Go to Debug.

In Command line arguments : add 64 before .xll for example "MyExcelDNALibrary-AddIn64.xll" like below. This will tell that 64-bit version XLL will be loaded in Excel when you debug the application else you will get error

Test:
We are now ready to test. In Visual Studio, in command bar make sure you select Debug and then click on the green triangle to run the project or else press F5 on keyboard to run application.

If you donot have any compile errors, your solution will be compiled and Excel-DNA creates few xll files. Excel should be launched and depending on your security settings it will ask whether
to enable the add-in. Just select Enable button. This will open your Excel session.

Select a cell in excel and give =CURRENTDATETIME() like below. ( If everything goes fine Excel intellisense will show the method like below).

Select method like below to see result.

In order to format cell, select cell and right-click and follow below


Now you must see sensible date like below

To use Add follow below


Conclusion :
In this article we saw how we can create user defined functions (UDFs) and use them in Excel using Excel-DNA add-in. We created functions using .NET and C#. In future post I will show you how to create custom ribbon bar in Excel and how we can add buttons to it and perform some functionality like open a web-browser and launch a sample page. Till then I hope you find this post useful.
I hope you enjoyed reading this post as much as I did while writing it. Please feel free to let me know your valuable and constructive comments and suggestions which can help me to make this article better and improve my technical and written skills. Last but not the least please excuse me for my grammar and typos.
Thanks and have a nice and wonderful day.
Saturday, February 25, 2017
Step by Step : Windows Phone 7 : Setting Up Development Environment
Hi,
Welcome to my blog of Windows Phone 7 Development. In this series of posts, I will try to explain various concepts in Windows Phone 7 Development. We will try to learn how to develop applications for Windows Phone 7. So lets start.
In this post we will see how to set up Windows Phone 7 Development environment.
Introduction:
Windows Phone 7 Development targets developing applications for Windows Phone 7 mobile operating system developed by Microsoft..NET framework is used to do Windows Phone 7 Development created by Microsoft. We can use any one of the several languages supported by the .NET framework, like C# to write applications which gets executed inside of a runtime environment called the Common Language Runtime. There are two distinct development approaches you can take when creating your application.
First Approach:
The first approach is to use Silverlight for Windows Phone. Silverlight is used by developers to create rich internet applications. A Silverlight application uses declarative markup (called XAML) to create user interface and code written in a .NET framework language to control an application’s behavior. For developing a data driven application for Windows Phone 7, we need to use Silverlight.
Second Approach:
The second approach is to use the XNA framework to develop your Windows Phone 7 app. It is Microsoft’s game development framework and has been used in recent years to create both Windows and Xbox 360 applications. If you’re creating a game for Windows Phone 7, you’ll likely use the XNA framework. The XNA framework is quite powerfu and need a great deal of learning curve and longer development cycles.
Installing SDK:
The Windows Phone 7 SDK is supported with one of the below operating systems except starter ( express ) versions
Hardware Requirements :
http://dev.windows.com/en-us/develop/download-phone-sdk

This will install the following in your system
Conclusion:
In this post we saw what are the hardward and software requirements to develop Windows Phone 7 applications and how we can install Windows Phone 7 SDK that will install the required components to start developing Windows Phone 7 applications.
In next post we will develop our first Windows Phone 7 application which is Hello World application.
I hope you enjoyed reading this post as much as I did while writing it. Please feel free to let me know your valuable and constructive comments and suggestions which can help me to make this article better and improve my technical and written skills. Last but not the least please excuse me for my grammar and typos.
Thanks and have a nice and wonderful day.
Welcome to my blog of Windows Phone 7 Development. In this series of posts, I will try to explain various concepts in Windows Phone 7 Development. We will try to learn how to develop applications for Windows Phone 7. So lets start.
In this post we will see how to set up Windows Phone 7 Development environment.
Introduction:
Windows Phone 7 Development targets developing applications for Windows Phone 7 mobile operating system developed by Microsoft..NET framework is used to do Windows Phone 7 Development created by Microsoft. We can use any one of the several languages supported by the .NET framework, like C# to write applications which gets executed inside of a runtime environment called the Common Language Runtime. There are two distinct development approaches you can take when creating your application.
First Approach:
The first approach is to use Silverlight for Windows Phone. Silverlight is used by developers to create rich internet applications. A Silverlight application uses declarative markup (called XAML) to create user interface and code written in a .NET framework language to control an application’s behavior. For developing a data driven application for Windows Phone 7, we need to use Silverlight.
Second Approach:
The second approach is to use the XNA framework to develop your Windows Phone 7 app. It is Microsoft’s game development framework and has been used in recent years to create both Windows and Xbox 360 applications. If you’re creating a game for Windows Phone 7, you’ll likely use the XNA framework. The XNA framework is quite powerfu and need a great deal of learning curve and longer development cycles.
Installing SDK:
The Windows Phone 7 SDK is supported with one of the below operating systems except starter ( express ) versions
- Windows Vista
- Windows 7
Hardware Requirements :
- Minimum 4GB hard disk space
- Minimum 3GB RamDirectX 10 or above capable graphics card with a WDDM 1.1 driver
http://dev.windows.com/en-us/develop/download-phone-sdk
- Windows Phone SDK 7.1
- Windows Phone SDK 7.1.1 Update
This will install the following in your system
- Microsoft Visual Studio 2010 Express For Windows Phone
- Windows Phone Emulator
- Windows Phone SDK 7.1 Assemblies
- Silverlight 4 SDK and DRT
- Windows Phone SDK 7.1 Extensions for XNA Game Studio 4.0
- Micorosoft Expression Blend SDK for Windows Phone 7
- Microsoft Expression Blend SDK for Windows Phone OS 7.1
- WCF Data Services Client for Windows Phone
- Microsoft Advertising SDK for Windows Phone
Conclusion:
In this post we saw what are the hardward and software requirements to develop Windows Phone 7 applications and how we can install Windows Phone 7 SDK that will install the required components to start developing Windows Phone 7 applications.
In next post we will develop our first Windows Phone 7 application which is Hello World application.
I hope you enjoyed reading this post as much as I did while writing it. Please feel free to let me know your valuable and constructive comments and suggestions which can help me to make this article better and improve my technical and written skills. Last but not the least please excuse me for my grammar and typos.
Thanks and have a nice and wonderful day.
Wednesday, April 27, 2016
Step By Step : ASP.NET Web API without ASP.NET MVC
Hi,
Welcome to my blog. In this post we will see a brief overview of how to create an Empty API Controller without ASP.NET MVC and call the methods in controller from a HTML Page using JQuery.
Overview:
Today my friend/colleague was working on a task where he was trying read two numbers from two text boxes and display their sum in a HTML page and his aim was to use Web API and he asked me to look into it. Since I never looked into Web API. I found it interesting and started looking tutorials and to my surprise I found a lot of tutorials where everyone was basically using same example like GetMovies and GetProducts and were preaching same thing without any clear explanation of what is exactly happening on backstage. The point which confused me is that how GetAllMovies and GetMovie(int id) will map to a url and why cannot I have one method name in my ApiController and overload it so that my urls maps and call what I need.I did this and want to write this post so that who ever wants it can use it.
In this post we will see following
1) Create a Empty API Controller with ASP.NET MVC application
2) How to call methods in Empty API Controller using JQuery in an HTML page.
This is just one of the way which I followed I am not saying this is the best and it doesnot have cons. My main aim is to share my experience so that it will be useful for the needy. I tried to make this post as much interesting as possible. Please excuse me for my grammatical errors and typos. I welcome your constructive comments and suggestions which helps in improving this post and my technical skills
Introduction:
Simply to say, ASP.NET Web API is a framework to create RESTFUL applications using .NET Framework. It does not need much configuration settings like WCF needs. We can build HTML services and reach more clients like browsers, tablet devices, and mobile devices. We can use XML or JSON or something else with these API by allowing us to create API or http based service or client endpoints.
Now let's start our work
For this article, I am using the following tools/technologies to develop a my sample application
Visual Studio 2013
C#
.NET Framework 4.5
JQuery
Our sample application will launch a HTML page in browser and will be like below

I always have the habit of creating empty solution first and then work on it. Here also I did same thing. I created an empty visual studio solution titled "ASPNETWebApiDemo"
In Solution Explorer, right click on soultion and click Add and then New Project as shown in below

In the Templates pane, select Installed Templates and expand the Visual C# node. Under Visual C#, select Web. In the list of project templates, select ASP.NET Web Application. Name the project "WebApiProject" and click OK as shown below

In the New ASP.NET Project dialog, select the Empty template. Under "Add folders and core references for", make sure to select check Web API. Click OK as shown below

Now your solution will look like below

Add a Controller:
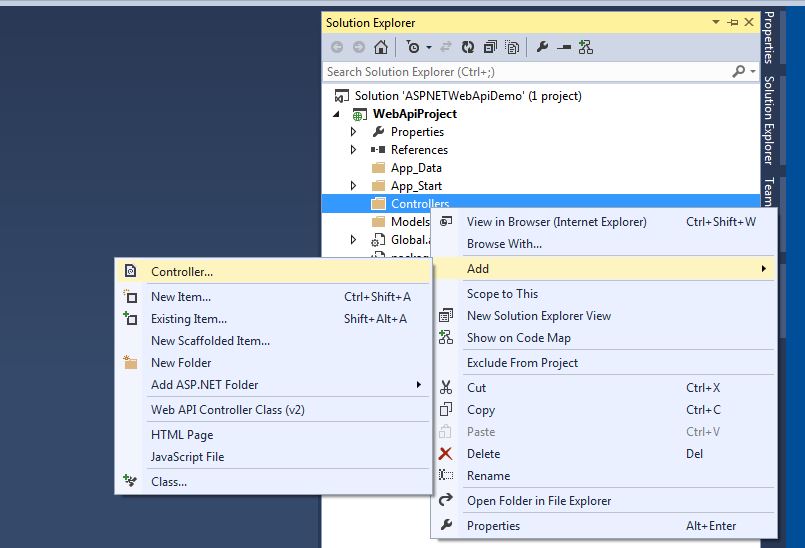
In Web API, a controller is an object that handles HTTP requests. The Web Api controllers inherit from ApiController unlike MVC controllers which inherit from Controller class. In Solution Explorer, right-click the Controllers folder. Select Add and then select Controller.
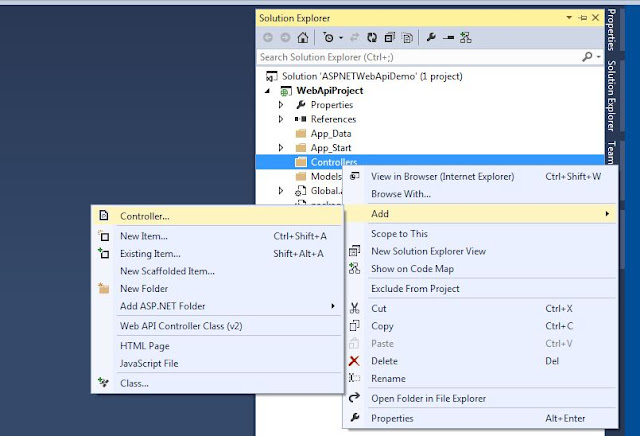
In the Add Scaffold dialog, select Web API Controller - Empty. Click Add.

In the Add Controller dialog, name the controller "DataController". Click Add.

The scaffolding creates a file named DataController.cs in the Controllers folder.

Normally DataController.cs is opened if not double-click the file to open it. Add below code to it
using System;
using System.Collections.Generic;
using System.Linq;
using System.Net;
using System.Net.Http;
using System.Web.Http;
namespace WebApiProject.Controllers
{
public class DataController : ApiController
{
[HttpGet]
public string GetData()
{
return "Hello from Data Controller";
}
[HttpGet]
public int GetData(string number1, string number2)
{
return Convert.ToInt32(number1) + Convert.ToInt32(number2);
}
[HttpGet]
public string GetData(int age)
{
return string.Format("Your age is : " + age);
}
}
}
As you can see DataController.cs has 3 methods with same name GetData() but with different parameters. I will explain how these methods are called in below section
Call WebApi :
We will call Web API using JQuery. You can also use JavaScript to call Web API. In this section we will add an HTML page that uses AJAX to call the Web API ( different methods in DataController.cs).
In Solution Explorer, right-click the project and select Add, then select New Item.

In the Add New Item dialog, select the Web node under Visual C#, and then select the HTML Page item. Name the page "DataPage.html"

Replace everything in this file with the following:
<!DOCTYPE html>
<html xmlns="http://www.w3.org/1999/xhtml">
<head>
<title>ASP.NET Web API DEMO</title>
</head>
<body>
<div>
Number 1:
<input type="text" id="num1" />
<br />
Number 2:
<input type="text" id="num2" />
<br />
<br />
<input type="button" value="Add" onclick="addValues();" />
<br />
<br />
Result
<br />
Addition : <span id="addResult"></span>
<br />
<br />
<input type="button" value="Get Message" onclick="getMessage();" />
<br />
<br />
Result
<br />
Message : <span id="message"></span>
<br />
<br />
<input type="button" value="Get Age" onclick="getAge();" />
<br />
<br />
Result
<br />
Message : <span id="ageMessage"></span>
</div>
<script src="http://ajax.aspnetcdn.com/ajax/jQuery/jquery-2.0.3.min.js"></script>
<script>
function getMessage() {
$('#message').text("");
var uri = 'api/Data';
$.getJSON(uri)
.done(function (data) {
$('#message').text(data);
})
.fail(function (jqXHR, textStatus, err) {
$('#message').text('Error: ' + err);
});
}
function addValues() {
$.ajax({
url: "/api/Data",
data: { number1: $('#num1').val(), number2: $('#num2').val() },
type: "GET",
contentType: "application/json;charset=utf-8",
statusCode: {
200: function (data) {
$('#addResult').text(data);
},
404: function () {
alert("Not Found!");
}
}
});
}
function getAge() {
$.ajax({
url: "/api/Data",
data: { age: "23" },
type: "GET",
contentType: "application/json;charset=utf-8",
statusCode: {
200: function (data) {
$('#ageMessage').text(data);
},
404: function () {
alert("Not Found!");
}
}
});
}
</script>
</body>
</html>
Now lets see how the methods in DataController.cs are called. I hope you have some background knowlegde of JQuery.
Here I am demonstrating how to call Web API using JQuery in two ways
1) getJSON and
2) ajax
1) GetData()
getMessage() is used to call this method using getJSON way. Here we need to create the uri in format of api/[controllername] in our case it will be api/data. In getMessage() we are not setting any data so the uri api/data will be mapped to GetData() method. In this we are using getJSON to call Web API
2) GetData(string number1, string number2)
addValues() is used to call this method using .ajax way. Here we need to create the uri in format of api/[controllername] in our case it will be api/data. Since GetData(string number1, string number2) is expecting some input parameters , in addValues() we need to setup data like below
data: { number1: $('#num1').val(), number2: $('#num2').val() }
so url and data when combined together will map to GetData(string number1, string number2)
url: "/api/Data",
data: { number1: $('#num1').val(), number2: $('#num2').val() },
IMPORTANT NOTE : Since GetData(string number1, string number2) is expecting number1 and number2 as names of parameters give same names in below line or else it wil try to match the first Get method and in our case it is GetData() and you will get wrong results
data: { number1: $('#num1').val(), number2: $('#num2').val() }
3) GetData(int age)
This is a same as above point. getAge() is used to call this method using .ajax way. Here we need to give exactly like below to match to GetData(int age) if not it will try to match the first Get method in our case GetData() and you will get wrong results
url: "/api/Data",
data: { age: "23" },
That's it. Build your application so that we donot have any errors. Then Run your application. If there are no errors then your DataPage will launch in your browser.
Give number1 and number2 some valid int values
Click Add so get sum. This is from GetData(string number1, string number2)
Click Get Message to get message. This is from GetData()
Click Get Age to get age. This is from GetData(int age)

Conclusion:
In this article we learned how to create a ASP.NET Web API without ASP.NET MVC. We created a ApiController class that has overloaded methods.We also saw how we can call controller overloaded methods using JQuery's getJSON and ajax ways. We also saw how urls are mapped to overload methods in ApiController.
Please feel free to let me know your valuable and constructive comments and suggestions which can help me to make this article better and improve my technical and written skills. Last but not the least please excuse me for my grammar and typos.
Thanks and have a nice and wonderful day.
Welcome to my blog. In this post we will see a brief overview of how to create an Empty API Controller without ASP.NET MVC and call the methods in controller from a HTML Page using JQuery.
Overview:
Today my friend/colleague was working on a task where he was trying read two numbers from two text boxes and display their sum in a HTML page and his aim was to use Web API and he asked me to look into it. Since I never looked into Web API. I found it interesting and started looking tutorials and to my surprise I found a lot of tutorials where everyone was basically using same example like GetMovies and GetProducts and were preaching same thing without any clear explanation of what is exactly happening on backstage. The point which confused me is that how GetAllMovies and GetMovie(int id) will map to a url and why cannot I have one method name in my ApiController and overload it so that my urls maps and call what I need.I did this and want to write this post so that who ever wants it can use it.
In this post we will see following
1) Create a Empty API Controller with ASP.NET MVC application
2) How to call methods in Empty API Controller using JQuery in an HTML page.
This is just one of the way which I followed I am not saying this is the best and it doesnot have cons. My main aim is to share my experience so that it will be useful for the needy. I tried to make this post as much interesting as possible. Please excuse me for my grammatical errors and typos. I welcome your constructive comments and suggestions which helps in improving this post and my technical skills
Introduction:
Simply to say, ASP.NET Web API is a framework to create RESTFUL applications using .NET Framework. It does not need much configuration settings like WCF needs. We can build HTML services and reach more clients like browsers, tablet devices, and mobile devices. We can use XML or JSON or something else with these API by allowing us to create API or http based service or client endpoints.
Now let's start our work
For this article, I am using the following tools/technologies to develop a my sample application
Visual Studio 2013
C#
.NET Framework 4.5
JQuery
Our sample application will launch a HTML page in browser and will be like below

I always have the habit of creating empty solution first and then work on it. Here also I did same thing. I created an empty visual studio solution titled "ASPNETWebApiDemo"
In Solution Explorer, right click on soultion and click Add and then New Project as shown in below

In the Templates pane, select Installed Templates and expand the Visual C# node. Under Visual C#, select Web. In the list of project templates, select ASP.NET Web Application. Name the project "WebApiProject" and click OK as shown below

In the New ASP.NET Project dialog, select the Empty template. Under "Add folders and core references for", make sure to select check Web API. Click OK as shown below

Now your solution will look like below
Add a Controller:
In Web API, a controller is an object that handles HTTP requests. The Web Api controllers inherit from ApiController unlike MVC controllers which inherit from Controller class. In Solution Explorer, right-click the Controllers folder. Select Add and then select Controller.
In the Add Scaffold dialog, select Web API Controller - Empty. Click Add.

In the Add Controller dialog, name the controller "DataController". Click Add.

The scaffolding creates a file named DataController.cs in the Controllers folder.

Normally DataController.cs is opened if not double-click the file to open it. Add below code to it
using System;
using System.Collections.Generic;
using System.Linq;
using System.Net;
using System.Net.Http;
using System.Web.Http;
namespace WebApiProject.Controllers
{
public class DataController : ApiController
{
[HttpGet]
public string GetData()
{
return "Hello from Data Controller";
}
[HttpGet]
public int GetData(string number1, string number2)
{
return Convert.ToInt32(number1) + Convert.ToInt32(number2);
}
[HttpGet]
public string GetData(int age)
{
return string.Format("Your age is : " + age);
}
}
}
As you can see DataController.cs has 3 methods with same name GetData() but with different parameters. I will explain how these methods are called in below section
Call WebApi :
We will call Web API using JQuery. You can also use JavaScript to call Web API. In this section we will add an HTML page that uses AJAX to call the Web API ( different methods in DataController.cs).
In Solution Explorer, right-click the project and select Add, then select New Item.

In the Add New Item dialog, select the Web node under Visual C#, and then select the HTML Page item. Name the page "DataPage.html"

Replace everything in this file with the following:
<!DOCTYPE html>
<html xmlns="http://www.w3.org/1999/xhtml">
<head>
<title>ASP.NET Web API DEMO</title>
</head>
<body>
<div>
Number 1:
<input type="text" id="num1" />
<br />
Number 2:
<input type="text" id="num2" />
<br />
<br />
<input type="button" value="Add" onclick="addValues();" />
<br />
<br />
Result
<br />
Addition : <span id="addResult"></span>
<br />
<br />
<input type="button" value="Get Message" onclick="getMessage();" />
<br />
<br />
Result
<br />
Message : <span id="message"></span>
<br />
<br />
<input type="button" value="Get Age" onclick="getAge();" />
<br />
<br />
Result
<br />
Message : <span id="ageMessage"></span>
</div>
<script src="http://ajax.aspnetcdn.com/ajax/jQuery/jquery-2.0.3.min.js"></script>
<script>
function getMessage() {
$('#message').text("");
var uri = 'api/Data';
$.getJSON(uri)
.done(function (data) {
$('#message').text(data);
})
.fail(function (jqXHR, textStatus, err) {
$('#message').text('Error: ' + err);
});
}
function addValues() {
$.ajax({
url: "/api/Data",
data: { number1: $('#num1').val(), number2: $('#num2').val() },
type: "GET",
contentType: "application/json;charset=utf-8",
statusCode: {
200: function (data) {
$('#addResult').text(data);
},
404: function () {
alert("Not Found!");
}
}
});
}
function getAge() {
$.ajax({
url: "/api/Data",
data: { age: "23" },
type: "GET",
contentType: "application/json;charset=utf-8",
statusCode: {
200: function (data) {
$('#ageMessage').text(data);
},
404: function () {
alert("Not Found!");
}
}
});
}
</script>
</body>
</html>
Now lets see how the methods in DataController.cs are called. I hope you have some background knowlegde of JQuery.
Here I am demonstrating how to call Web API using JQuery in two ways
1) getJSON and
2) ajax
1) GetData()
getMessage() is used to call this method using getJSON way. Here we need to create the uri in format of api/[controllername] in our case it will be api/data. In getMessage() we are not setting any data so the uri api/data will be mapped to GetData() method. In this we are using getJSON to call Web API
2) GetData(string number1, string number2)
addValues() is used to call this method using .ajax way. Here we need to create the uri in format of api/[controllername] in our case it will be api/data. Since GetData(string number1, string number2) is expecting some input parameters , in addValues() we need to setup data like below
data: { number1: $('#num1').val(), number2: $('#num2').val() }
so url and data when combined together will map to GetData(string number1, string number2)
url: "/api/Data",
data: { number1: $('#num1').val(), number2: $('#num2').val() },
IMPORTANT NOTE : Since GetData(string number1, string number2) is expecting number1 and number2 as names of parameters give same names in below line or else it wil try to match the first Get method and in our case it is GetData() and you will get wrong results
data: { number1: $('#num1').val(), number2: $('#num2').val() }
3) GetData(int age)
This is a same as above point. getAge() is used to call this method using .ajax way. Here we need to give exactly like below to match to GetData(int age) if not it will try to match the first Get method in our case GetData() and you will get wrong results
url: "/api/Data",
data: { age: "23" },
That's it. Build your application so that we donot have any errors. Then Run your application. If there are no errors then your DataPage will launch in your browser.
Give number1 and number2 some valid int values
Click Add so get sum. This is from GetData(string number1, string number2)
Click Get Message to get message. This is from GetData()
Click Get Age to get age. This is from GetData(int age)

Conclusion:
In this article we learned how to create a ASP.NET Web API without ASP.NET MVC. We created a ApiController class that has overloaded methods.We also saw how we can call controller overloaded methods using JQuery's getJSON and ajax ways. We also saw how urls are mapped to overload methods in ApiController.
Please feel free to let me know your valuable and constructive comments and suggestions which can help me to make this article better and improve my technical and written skills. Last but not the least please excuse me for my grammar and typos.
Thanks and have a nice and wonderful day.
Friday, July 24, 2015
Step By Step : Create and Consume WCF Restful Service
Hi,
Welcome to my blog. In this post we will see how we can create a WCF RESTFUL service and how Windows Forms Application calls methods in that WCF RESTFUL service using WebRequest and WebClient classes.
Overview:
When I started to look into Restful web services, I was able to find many posts regarding how to implement a simple RESTful web service using WCF. But it was hard for me to find out how to calling RESTFUL service methods using HTTP verbs like POST, GET, DELETE and PUSH using C# code. Every post I came across was happpy to tell about call GET methods using Fiddler or browser or call methods using Javascript ot JQuery. I wanted some sample using C# code which calls all methods using HTTP verbs like POST, GET, DELETE and PUSH. So, I wrote this post so that it will be helpful for the needy.
In this post we will see step by step process of how to implement a simple RESTful web service using WCF and using a Windows Forms application and call WCF RESTFUL service methods using HTTP verbs like POST, GET, DELETE and PUSH.
This is just one of the way which I followed I am not saying this is the best and it doesnot have cons. My main aim is to share my experience so that it will be useful for the needy. I tried to make this post as much interesting as possible. Please excuse me for my grammatical errors and typos. I welcome your constructive comments and suggestions which helps in improving this post and my technical skills.
Introduction:
REST stands for Representational State Transfer. RESTful web services use HTTP verbs. They expose either a collection resource (representational of a list) or an element resource (representational of a single item in the list).
HTTP verbs maps CRUD operations to HTTP methods as below
Create (POST) => create a new resource.
Read (GET) => retrieve one or many resources.
Update (PUT) => update an existing resource.
Delete (DELETE)
Now let's start our work
For this article, I am using the following tools/technologies to develop a my sample application
Visual Studio 2013
C#
.NET Framework 4.5
Our sample application will launch a windows form UI with a datagrid view to show results and it has buttons to do the following
Get Books : Get all books. This uses WebRequest class to make service call.
Get Book : Get a book depending on ID. This uses WebClient class to make service call.
Add Book : Create a new book.This uses WebRequest class to make service call
Update Book: Update an existing book with new details. This uses WebClient class to make service call
Delete Book: Delete a particular book. This uses WebRequest class to make service call
The final UI will look something like this.

I always have the habit of creating empty solution first and then work on it. Here also I did same thing. I created an empty visual studio solution titled "RestfulTutorials" and added below 3 projects.
Data : This a standard C# class library. The data project will contain our entities, and all logic that provided data to our application. In this case, for simplicity, I added nothing.
WCFService: This is a WCF Service library and contains our WCF RESTful service definition, all associated configuration, and each of our CRUD methods
WindowsClient: This is a sample windows forms application that will call WCF service methods using HTTP verbs(POST,PUT...).
After adding your projects your solution must look like below.

Data : Add new class and name it as Book.cs. Add below code to it. We need to decorated Book class with DataContract attribute so that it can be passed between client ( WindowsClient) and service (WCFService). Book class is serialized and pass between client and server. Each property that we want to be serialized is decorated with DataMember attribute
[DataContract]
public class Book
{
[DataMember]
public int Id { get; set; }
[DataMember]
public string Name { get; set; }
[DataMember]
public float Price { get; set; }
}
Data project is simple. As I said it has nothing. Build your solution to make sure you donot have any errors.
WCFService: Make sure you have below references in your WCFService project and rename IService1.cs to IBookService.cs and Service1.cs to BookService.cs. Delete everything in IBookService.cs and BookService.cs. You project must look like below

Build your solution to make sure you donot have any errors.
Open App.config and do the following
1) Make sure that the service name matches the full namespace for your service interface;
<system.serviceModel>
<services>
<service name="WCFService.BookService">
2) Add behavior like below
<endpointBehaviors>
<behavior name="web">
<webHttp automaticFormatSelectionEnabled="true" defaultOutgoingResponseFormat="Json"/>
</behavior>
</endpointBehaviors>
3) Add endpoint with webHttpBinding like below and with behaviorConfiguration equals to above behavior name.
<endpoint address="" binding="webHttpBinding" contract="WCFService.IBookService" behaviorConfiguration="web">
<identity>
<dns value="localhost" />
</identity>
</endpoint>
4) Update the baseAddress appropriately. Here I am updating the base address to tell WCF to use the port number 8085 and simplifed the address
<host>
<baseAddresses>
<add baseAddress="http://localhost:8085/BookService/" />
</baseAddresses>
</host>
Your App.config must looks like below

Now add a reference to the Data project to WCFService project since we need to use Book object in service project.
Now in IBookService.cs add GetBooks() like below which returns list of Books. The WebGet attribute is a REST specific attribute indicating that the operation is accessible via the HTTP GET verb. The WebInvoke attribute can be used for POST, PUT and DELETE verbs. To make the operations RESTful, we need to update WebGet attribute to indicate that we can execute this method using http://localhost:8085/BookService/Books url.
[OperationContract]
[WebGet(UriTemplate="/Books")]
IList<Book> GetBooks();
It is also possible to pass parameters into URL in order to return specific book rather than all books. Please add GetBook method like below.
[OperationContract]
[WebGet(UriTemplate = "/Book/{id}")]
Book GetBookById(string id);
A place-marker ({id}) is used to indicate that a parameter will be provided, and that marker matches the name of the parameter accepted by the operation. Unfortunately, parameter type in URL as always strings. We have to manually cast the string to desired type before using it.
Other HTTP verbs are just as easy to implement. Add the following operations to your service contract
[OperationContract]
[WebInvoke(Method="POST", UriTemplate="/Book")]
IList<Book> CreateBook(Book newBook);
[OperationContract]
[WebInvoke(Method="PUT", UriTemplate="/Book")]
IList<Book> UpdateBook(Book book);
[OperationContract]
[WebInvoke(Method="DELETE", UriTemplate="/Book/{id}")]
IList<Book> DeleteBook(string id);
Instead of using the WebGet attribute, we use the WebInvoke attribute, which basically means most other verbs other than GET. As we’re not using Uri templates with place-markers, we can pass in a complex object from the client and WCF will just figure out what to do with it.
For completeness, here are IBookService.cs and BookService.cs;
public interface IBookService
{
// TODO: Add your service operations here
[OperationContract]
[WebGet(UriTemplate="/Books")]
IList<Book> GetBooks();
[OperationContract]
[WebGet(UriTemplate = "/Book/{id}")]
Book GetBookById(string id);
[OperationContract]
[WebInvoke(Method="POST", UriTemplate="/Book")]
IList<Book> CreateBook(Book newBook);
[OperationContract]
[WebInvoke(Method="PUT", UriTemplate="/Book")]
IList<Book> UpdateBook(Book book);
[OperationContract]
[WebInvoke(Method="DELETE", UriTemplate="/Book/{id}")]
IList<Book> DeleteBook(string id);
}
public class BookService : IBookService
{
IList<Book> books = null;
public BookService()
{
books = new List<Book>();
books.Add(new Book() { Id = 1, Name = "Book 1", Price = 10.34f });
books.Add(new Book() { Id = 2, Name = "Book 2", Price = 20.34f });
books.Add(new Book() { Id = 3, Name = "Book 3", Price = 30.34f });
books.Add(new Book() { Id = 4, Name = "Book 4", Price = 40.34f });
books.Add(new Book() { Id = 5, Name = "Book 5", Price = 50.34f });
}
public IList<Book> GetBooks()
{
return books;
}
public Book GetBookById(string id)
{
int bookId = Convert.ToInt32(id);
return books.Where(book => book.Id == bookId).FirstOrDefault();
}
public IList<Book> CreateBook(Book newBook)
{
int newBookId = books.Max(x => x.Id);
books.Add(new Book() {Id = newBookId+1, Name=newBook.Name, Price = newBook.Price });
return books;
}
public IList<Book> UpdateBook(Book book)
{
Book updateBook = books.Where(x => x.Id == book.Id).First();
updateBook.Name = book.Name;
updateBook.Price = book.Price;
return books;
}
public IList<Book> DeleteBook(string id)
{
Book deleteBook = books.Where(x => x.Id == Convert.ToInt32(id)).First();
books.Remove(deleteBook);
return books;
}
}
Build your solution to make sure you donot have any errors.
WindowsClient : Now add a reference to the Data project to WindowsClient project since we need to use Book object in service project.. Create windows form UI with 5 buttons and a datagridview.Here we demonstrate how to work with both WebRequest and WebClient classes.
WebRequest : This is an abstract class and we cannot use it directly. We use Create method to create an instance of WebRequest and use GetResponseStream() to return a data stream. FileWebRequest and FtpWebRequest classes inherit from WebRequest. We use WebRequest to make a request and convert the return to either HttpWebRequest, FileWebRequest or FtpWebRequest, depending on our request. Using HttpWebRequest, we have to get the response of our request, instantiate StreamReader to read the response and finally, convert the result to whatever type we expect
WebClient: It provides common operations to sending and receiving data from a resource identified by a URI. It is a higher-level abstraction of HttpWebRequest. The operations like DownloadData and DownloadFile is what differentiate WebClient from HttpWebRequest and simplify code we would do with HttpWebRequest.
The simplest one is calling GET methods. Please see below for GetBooks and GetBook methods calling.
GetBooks: Using WebRequest
private void btnGetBooks_Click(object sender, EventArgs e)
{
try
{
//This will match GetBooks in IBookService.cs
WebRequest request = WebRequest.Create(@"http://localhost:8085/BookService/Books");
request.Method = "GET"; //HTTP : GET method
using (WebResponse response = request.GetResponse()) // calling REST method
{
//below code to access the result.
using (Stream responseStream = response.GetResponseStream())
{
DataContractJsonSerializer serializer = new DataContractJsonSerializer(typeof(IList<Book>));
IList<Book> books = (IList<Book>)serializer.ReadObject(responseStream);
bindingSource1.DataSource = books;
dvBooks.DataSource = bindingSource1;
}
}
}
catch (Exception ex)
{
}
}
GetBook : Using WebClient
private void btnGetBook_Click(object sender, EventArgs e)
{
try
{
using(WebClient client = new WebClient())
{
Uri uri = new Uri(@"http://localhost:8085/BookService/Book/2");
client.DownloadDataCompleted += OnGetBookCompleted;
client.DownloadDataAsync(uri);
}
}
catch (Exception ex)
{
}
}
void OnGetBookCompleted(object sender, DownloadDataCompletedEventArgs e)
{
byte[] result = e.Result as byte[];
MemoryStream responseStream = new MemoryStream(result);
DataContractJsonSerializer serializer = new DataContractJsonSerializer(typeof(Book));
Book book = (Book)serializer.ReadObject(responseStream);
bindingSource1.DataSource = book;
dvBooks.DataSource = bindingSource1;
}
DeleteBook : This is also simple. Using WebRequest
private void btnDeleteBook_Click(object sender, EventArgs e)
{
try
{
//This will match DeleteBook in IBookService.cs. I am hard coding id here
WebRequest request = WebRequest.Create(@"http://localhost:8085/BookService/Book/2");
request.Method = "DELETE"; // HTTP Delete Method
//invoke REST method
using (WebResponse response = request.GetResponse())
{
//below code to access the result.
using (Stream responseStream = response.GetResponseStream())
{
DataContractJsonSerializer serializer = new DataContractJsonSerializer(typeof(IList<Book>));
IList<Book> books = (IList<Book>)serializer.ReadObject(responseStream);
bindingSource1.DataSource = books;
dvBooks.DataSource = bindingSource1;
}
}
}
catch (Exception ex)
{
}
}
AddBook: This is little bit tricky since we need to provide new book that must be added to collection. Please see below code. Using WebRequest
private void btnAddBook_Click(object sender, EventArgs e)
{
try
{
Book newBook = new Book() { Id = 0, Name = "New Book", Price = 123.45f };
//create new request
//This will match AddBook in IBookService.cs
WebRequest request = WebRequest.Create(@"http://localhost:8085/BookService/Book");
request.Method = "POST";
request.ContentType = "application/json; charset=utf-8";
//add new update book info to request
Stream stream = request.GetRequestStream();
DataContractJsonSerializer ser = new DataContractJsonSerializer(typeof(Book));
ser.WriteObject(stream, newBook);
//invoke REST method
using (WebResponse response = request.GetResponse())
{
using (Stream responseStream = response.GetResponseStream())
{
DataContractJsonSerializer serializer = new DataContractJsonSerializer(typeof(IList<Book>));
IList<Book> books = (IList<Book>)serializer.ReadObject(responseStream); // since we get collection back
bindingSource1.DataSource = books;
dvBooks.DataSource = bindingSource1;
}
}
}
catch (Exception ex)
{
}
}
UpdateBook: This is little bit tricky since we need to provide new book that must be updated and added to collection. Please see below code. Using WebClient
private void btnUpdateBook_Click(object sender, EventArgs e)
{
try
{
using(WebClient client = new WebClient())
{
client.Headers[HttpRequestHeader.ContentType] = "text/json";
Uri uri = new Uri(@"http://localhost:8085/BookService/Book");
Book updateBook = new Book() { Id = 3, Name = "UpdateBook Name 3", Price = 77.77f };
MemoryStream requestStream = new MemoryStream();
DataContractJsonSerializer requestSerializer = new DataContractJsonSerializer(typeof(Book));
requestSerializer.WriteObject(requestStream, updateBook);
client.UploadDataCompleted += OnUpdateBookCompleted;
client.UploadDataAsync(uri, "PUT",requestStream.ToArray());
}
}
catch (Exception ex)
{
}
}
void OnUpdateBookCompleted(object sender, UploadDataCompletedEventArgs e)
{
byte[] result = e.Result as byte[];
MemoryStream responseStream = new MemoryStream(result);
DataContractJsonSerializer serializer = new DataContractJsonSerializer(typeof(IList<Book>));
IList<Book> books = (IList<Book>)serializer.ReadObject(responseStream);
bindingSource1.DataSource = books;
dvBooks.DataSource = bindingSource1;
}
For completeness, here is full code for Form1.cs in WindowsClient project
using System;
using System.Collections.Generic;
using System.ComponentModel;
using System.Data;
using System.Drawing;
using System.Linq;
using System.Text;
using System.Threading.Tasks;
using System.Windows.Forms;
using System.Net;
using System.IO;
using System.Xml.XPath;
using System.Xml;
using Data;
using System.Runtime.Serialization.Json;
namespace WindowsClient
{
public partial class Form1 : Form
{
private BindingSource bindingSource1 = new BindingSource();
public Form1()
{
InitializeComponent();
}
//GetBooks : GET
private void btnGetBooks_Click(object sender, EventArgs e)
{
try
{
WebRequest request = WebRequest.Create(@"http://localhost:8085/BookService/Books");
request.Method = "GET";
using (WebResponse response = request.GetResponse())
{
using (Stream responseStream = response.GetResponseStream())
{
DataContractJsonSerializer serializer = new DataContractJsonSerializer(typeof(IList<Book>));
IList<Book> books = (IList<Book>)serializer.ReadObject(responseStream);
bindingSource1.DataSource = books;
dvBooks.DataSource = bindingSource1;
}
}
}
catch (Exception ex)
{
}
}
//GetBook : GET
private void btnGetBook_Click(object sender, EventArgs e)
{
try
{
using(WebClient client = new WebClient())
{
Uri uri = new Uri(@"http://localhost:8085/BookService/Book/2");
client.DownloadDataCompleted += OnGetBookCompleted;
client.DownloadDataAsync(uri);
}
}
catch (Exception ex)
{
}
}
void OnGetBookCompleted(object sender, DownloadDataCompletedEventArgs e)
{
byte[] result = e.Result as byte[];
MemoryStream responseStream = new MemoryStream(result);
DataContractJsonSerializer serializer = new DataContractJsonSerializer(typeof(Book));
Book book = (Book)serializer.ReadObject(responseStream);
bindingSource1.DataSource = book;
dvBooks.DataSource = bindingSource1;
}
private void btnUpdateBook_Click(object sender, EventArgs e)
{
try
{
using(WebClient client = new WebClient())
{
client.Headers[HttpRequestHeader.ContentType] = "text/json";
Uri uri = new Uri(@"http://localhost:8085/BookService/Book");
Book updateBook = new Book() { Id = 3, Name = "UpdateBook Name 3", Price = 77.77f };
MemoryStream requestStream = new MemoryStream();
DataContractJsonSerializer requestSerializer = new DataContractJsonSerializer(typeof(Book));
requestSerializer.WriteObject(requestStream, updateBook);
client.UploadDataCompleted += OnUpdateBookCompleted;
client.UploadDataAsync(uri, "PUT",requestStream.ToArray());
}
}
catch (Exception ex)
{
}
}
void OnUpdateBookCompleted(object sender, UploadDataCompletedEventArgs e)
{
byte[] result = e.Result as byte[];
MemoryStream responseStream = new MemoryStream(result);
DataContractJsonSerializer serializer = new DataContractJsonSerializer(typeof(IList<Book>));
IList<Book> books = (IList<Book>)serializer.ReadObject(responseStream);
bindingSource1.DataSource = books;
dvBooks.DataSource = bindingSource1;
}
private void btnAddBook_Click(object sender, EventArgs e)
{
try
{
Book newBook = new Book() { Id = 0, Name = "New Book", Price = 123.45f };
//create new request
WebRequest request = WebRequest.Create(@"http://localhost:8085/BookService/Book");
request.Method = "POST";
request.ContentType = "application/json; charset=utf-8";
//add new update book info to request
Stream stream = request.GetRequestStream();
DataContractJsonSerializer ser = new DataContractJsonSerializer(typeof(Book));
ser.WriteObject(stream, newBook);
//invoke REST method
using (WebResponse response = request.GetResponse())
{
using (Stream responseStream = response.GetResponseStream())
{
DataContractJsonSerializer serializer = new DataContractJsonSerializer(typeof(IList<Book>));
IList<Book> books = (IList<Book>)serializer.ReadObject(responseStream);
bindingSource1.DataSource = books;
dvBooks.DataSource = bindingSource1;
}
}
}
catch (Exception ex)
{
}
}
private void btnDeleteBook_Click(object sender, EventArgs e)
{
try
{
WebRequest request = WebRequest.Create(@"http://localhost:8085/BookService/Book/2");
request.Method = "DELETE";
//invoke REST method
using (WebResponse response = request.GetResponse())
{
using (Stream responseStream = response.GetResponseStream())
{
DataContractJsonSerializer serializer = new DataContractJsonSerializer(typeof(IList<Book>));
IList<Book> books = (IList<Book>)serializer.ReadObject(responseStream);
bindingSource1.DataSource = books;
dvBooks.DataSource = bindingSource1;
}
}
}
catch (Exception ex)
{
}
}
}
}
That's it. Build your application so that we donot have any errors.
The easiest way to run your application is to do following. Right click on your Solution and go to Properties and select Multiple startup projects and Start WCFSErvice and WindowsClient projects as show below and click Ok.

Now run your application by simply pressing F5 which starts your WCFService and WindowsClient projects and if everything goes fine all the buttons must work like below.
GetBooks:

GetBook:

DeleteBook:

AddBook:

UpdateBook:

Conclusion:
In this article we learned how to implement a simple RESTful web service using WCF and how we can call all the Restful HTTP methods using HTTP verbs like PUT, POST, GET, DELETE by using a simple windows form client application.
Please feel free to let me know your valuable and constructive comments and suggestions which can help me to make this article better and improve my technical and written skills. Last but not the least please excuse me for my grammar and typos.
Thanks and have a nice and wonderful day.
Welcome to my blog. In this post we will see how we can create a WCF RESTFUL service and how Windows Forms Application calls methods in that WCF RESTFUL service using WebRequest and WebClient classes.
Overview:
When I started to look into Restful web services, I was able to find many posts regarding how to implement a simple RESTful web service using WCF. But it was hard for me to find out how to calling RESTFUL service methods using HTTP verbs like POST, GET, DELETE and PUSH using C# code. Every post I came across was happpy to tell about call GET methods using Fiddler or browser or call methods using Javascript ot JQuery. I wanted some sample using C# code which calls all methods using HTTP verbs like POST, GET, DELETE and PUSH. So, I wrote this post so that it will be helpful for the needy.
In this post we will see step by step process of how to implement a simple RESTful web service using WCF and using a Windows Forms application and call WCF RESTFUL service methods using HTTP verbs like POST, GET, DELETE and PUSH.
This is just one of the way which I followed I am not saying this is the best and it doesnot have cons. My main aim is to share my experience so that it will be useful for the needy. I tried to make this post as much interesting as possible. Please excuse me for my grammatical errors and typos. I welcome your constructive comments and suggestions which helps in improving this post and my technical skills.
Introduction:
REST stands for Representational State Transfer. RESTful web services use HTTP verbs. They expose either a collection resource (representational of a list) or an element resource (representational of a single item in the list).
HTTP verbs maps CRUD operations to HTTP methods as below
Create (POST) => create a new resource.
Read (GET) => retrieve one or many resources.
Update (PUT) => update an existing resource.
Delete (DELETE)
Now let's start our work
For this article, I am using the following tools/technologies to develop a my sample application
Visual Studio 2013
C#
.NET Framework 4.5
Our sample application will launch a windows form UI with a datagrid view to show results and it has buttons to do the following
Get Books : Get all books. This uses WebRequest class to make service call.
Get Book : Get a book depending on ID. This uses WebClient class to make service call.
Add Book : Create a new book.This uses WebRequest class to make service call
Update Book: Update an existing book with new details. This uses WebClient class to make service call
Delete Book: Delete a particular book. This uses WebRequest class to make service call
The final UI will look something like this.
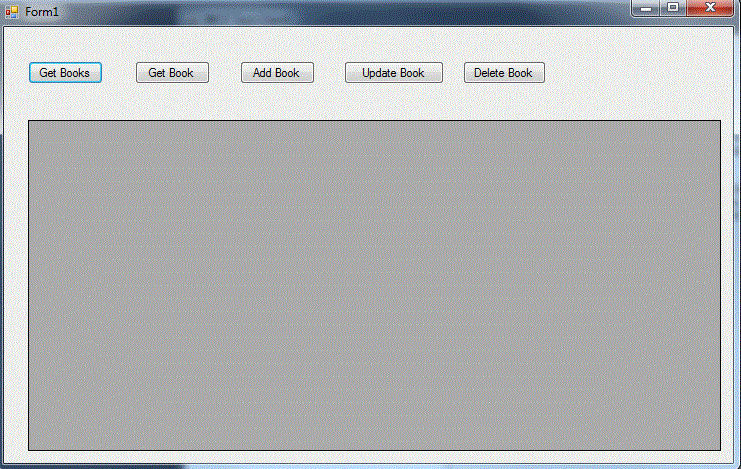
I always have the habit of creating empty solution first and then work on it. Here also I did same thing. I created an empty visual studio solution titled "RestfulTutorials" and added below 3 projects.
Data : This a standard C# class library. The data project will contain our entities, and all logic that provided data to our application. In this case, for simplicity, I added nothing.
WCFService: This is a WCF Service library and contains our WCF RESTful service definition, all associated configuration, and each of our CRUD methods
WindowsClient: This is a sample windows forms application that will call WCF service methods using HTTP verbs(POST,PUT...).
After adding your projects your solution must look like below.

Data : Add new class and name it as Book.cs. Add below code to it. We need to decorated Book class with DataContract attribute so that it can be passed between client ( WindowsClient) and service (WCFService). Book class is serialized and pass between client and server. Each property that we want to be serialized is decorated with DataMember attribute
[DataContract]
public class Book
{
[DataMember]
public int Id { get; set; }
[DataMember]
public string Name { get; set; }
[DataMember]
public float Price { get; set; }
}
Data project is simple. As I said it has nothing. Build your solution to make sure you donot have any errors.
WCFService: Make sure you have below references in your WCFService project and rename IService1.cs to IBookService.cs and Service1.cs to BookService.cs. Delete everything in IBookService.cs and BookService.cs. You project must look like below
Build your solution to make sure you donot have any errors.
Open App.config and do the following
1) Make sure that the service name matches the full namespace for your service interface;
<system.serviceModel>
<services>
<service name="WCFService.BookService">
2) Add behavior like below
<endpointBehaviors>
<behavior name="web">
<webHttp automaticFormatSelectionEnabled="true" defaultOutgoingResponseFormat="Json"/>
</behavior>
</endpointBehaviors>
3) Add endpoint with webHttpBinding like below and with behaviorConfiguration equals to above behavior name.
<endpoint address="" binding="webHttpBinding" contract="WCFService.IBookService" behaviorConfiguration="web">
<identity>
<dns value="localhost" />
</identity>
</endpoint>
4) Update the baseAddress appropriately. Here I am updating the base address to tell WCF to use the port number 8085 and simplifed the address
<host>
<baseAddresses>
<add baseAddress="http://localhost:8085/BookService/" />
</baseAddresses>
</host>
Your App.config must looks like below

Now add a reference to the Data project to WCFService project since we need to use Book object in service project.
Now in IBookService.cs add GetBooks() like below which returns list of Books. The WebGet attribute is a REST specific attribute indicating that the operation is accessible via the HTTP GET verb. The WebInvoke attribute can be used for POST, PUT and DELETE verbs. To make the operations RESTful, we need to update WebGet attribute to indicate that we can execute this method using http://localhost:8085/BookService/Books url.
[OperationContract]
[WebGet(UriTemplate="/Books")]
IList<Book> GetBooks();
It is also possible to pass parameters into URL in order to return specific book rather than all books. Please add GetBook method like below.
[OperationContract]
[WebGet(UriTemplate = "/Book/{id}")]
Book GetBookById(string id);
A place-marker ({id}) is used to indicate that a parameter will be provided, and that marker matches the name of the parameter accepted by the operation. Unfortunately, parameter type in URL as always strings. We have to manually cast the string to desired type before using it.
Other HTTP verbs are just as easy to implement. Add the following operations to your service contract
[OperationContract]
[WebInvoke(Method="POST", UriTemplate="/Book")]
IList<Book> CreateBook(Book newBook);
[OperationContract]
[WebInvoke(Method="PUT", UriTemplate="/Book")]
IList<Book> UpdateBook(Book book);
[OperationContract]
[WebInvoke(Method="DELETE", UriTemplate="/Book/{id}")]
IList<Book> DeleteBook(string id);
Instead of using the WebGet attribute, we use the WebInvoke attribute, which basically means most other verbs other than GET. As we’re not using Uri templates with place-markers, we can pass in a complex object from the client and WCF will just figure out what to do with it.
For completeness, here are IBookService.cs and BookService.cs;
public interface IBookService
{
// TODO: Add your service operations here
[OperationContract]
[WebGet(UriTemplate="/Books")]
IList<Book> GetBooks();
[OperationContract]
[WebGet(UriTemplate = "/Book/{id}")]
Book GetBookById(string id);
[OperationContract]
[WebInvoke(Method="POST", UriTemplate="/Book")]
IList<Book> CreateBook(Book newBook);
[OperationContract]
[WebInvoke(Method="PUT", UriTemplate="/Book")]
IList<Book> UpdateBook(Book book);
[OperationContract]
[WebInvoke(Method="DELETE", UriTemplate="/Book/{id}")]
IList<Book> DeleteBook(string id);
}
public class BookService : IBookService
{
IList<Book> books = null;
public BookService()
{
books = new List<Book>();
books.Add(new Book() { Id = 1, Name = "Book 1", Price = 10.34f });
books.Add(new Book() { Id = 2, Name = "Book 2", Price = 20.34f });
books.Add(new Book() { Id = 3, Name = "Book 3", Price = 30.34f });
books.Add(new Book() { Id = 4, Name = "Book 4", Price = 40.34f });
books.Add(new Book() { Id = 5, Name = "Book 5", Price = 50.34f });
}
public IList<Book> GetBooks()
{
return books;
}
public Book GetBookById(string id)
{
int bookId = Convert.ToInt32(id);
return books.Where(book => book.Id == bookId).FirstOrDefault();
}
public IList<Book> CreateBook(Book newBook)
{
int newBookId = books.Max(x => x.Id);
books.Add(new Book() {Id = newBookId+1, Name=newBook.Name, Price = newBook.Price });
return books;
}
public IList<Book> UpdateBook(Book book)
{
Book updateBook = books.Where(x => x.Id == book.Id).First();
updateBook.Name = book.Name;
updateBook.Price = book.Price;
return books;
}
public IList<Book> DeleteBook(string id)
{
Book deleteBook = books.Where(x => x.Id == Convert.ToInt32(id)).First();
books.Remove(deleteBook);
return books;
}
}
Build your solution to make sure you donot have any errors.
WindowsClient : Now add a reference to the Data project to WindowsClient project since we need to use Book object in service project.. Create windows form UI with 5 buttons and a datagridview.Here we demonstrate how to work with both WebRequest and WebClient classes.
WebRequest : This is an abstract class and we cannot use it directly. We use Create method to create an instance of WebRequest and use GetResponseStream() to return a data stream. FileWebRequest and FtpWebRequest classes inherit from WebRequest. We use WebRequest to make a request and convert the return to either HttpWebRequest, FileWebRequest or FtpWebRequest, depending on our request. Using HttpWebRequest, we have to get the response of our request, instantiate StreamReader to read the response and finally, convert the result to whatever type we expect
WebClient: It provides common operations to sending and receiving data from a resource identified by a URI. It is a higher-level abstraction of HttpWebRequest. The operations like DownloadData and DownloadFile is what differentiate WebClient from HttpWebRequest and simplify code we would do with HttpWebRequest.
The simplest one is calling GET methods. Please see below for GetBooks and GetBook methods calling.
GetBooks: Using WebRequest
private void btnGetBooks_Click(object sender, EventArgs e)
{
try
{
//This will match GetBooks in IBookService.cs
WebRequest request = WebRequest.Create(@"http://localhost:8085/BookService/Books");
request.Method = "GET"; //HTTP : GET method
using (WebResponse response = request.GetResponse()) // calling REST method
{
//below code to access the result.
using (Stream responseStream = response.GetResponseStream())
{
DataContractJsonSerializer serializer = new DataContractJsonSerializer(typeof(IList<Book>));
IList<Book> books = (IList<Book>)serializer.ReadObject(responseStream);
bindingSource1.DataSource = books;
dvBooks.DataSource = bindingSource1;
}
}
}
catch (Exception ex)
{
}
}
GetBook : Using WebClient
private void btnGetBook_Click(object sender, EventArgs e)
{
try
{
using(WebClient client = new WebClient())
{
Uri uri = new Uri(@"http://localhost:8085/BookService/Book/2");
client.DownloadDataCompleted += OnGetBookCompleted;
client.DownloadDataAsync(uri);
}
}
catch (Exception ex)
{
}
}
void OnGetBookCompleted(object sender, DownloadDataCompletedEventArgs e)
{
byte[] result = e.Result as byte[];
MemoryStream responseStream = new MemoryStream(result);
DataContractJsonSerializer serializer = new DataContractJsonSerializer(typeof(Book));
Book book = (Book)serializer.ReadObject(responseStream);
bindingSource1.DataSource = book;
dvBooks.DataSource = bindingSource1;
}
DeleteBook : This is also simple. Using WebRequest
private void btnDeleteBook_Click(object sender, EventArgs e)
{
try
{
//This will match DeleteBook in IBookService.cs. I am hard coding id here
WebRequest request = WebRequest.Create(@"http://localhost:8085/BookService/Book/2");
request.Method = "DELETE"; // HTTP Delete Method
//invoke REST method
using (WebResponse response = request.GetResponse())
{
//below code to access the result.
using (Stream responseStream = response.GetResponseStream())
{
DataContractJsonSerializer serializer = new DataContractJsonSerializer(typeof(IList<Book>));
IList<Book> books = (IList<Book>)serializer.ReadObject(responseStream);
bindingSource1.DataSource = books;
dvBooks.DataSource = bindingSource1;
}
}
}
catch (Exception ex)
{
}
}
AddBook: This is little bit tricky since we need to provide new book that must be added to collection. Please see below code. Using WebRequest
private void btnAddBook_Click(object sender, EventArgs e)
{
try
{
Book newBook = new Book() { Id = 0, Name = "New Book", Price = 123.45f };
//create new request
//This will match AddBook in IBookService.cs
WebRequest request = WebRequest.Create(@"http://localhost:8085/BookService/Book");
request.Method = "POST";
request.ContentType = "application/json; charset=utf-8";
//add new update book info to request
Stream stream = request.GetRequestStream();
DataContractJsonSerializer ser = new DataContractJsonSerializer(typeof(Book));
ser.WriteObject(stream, newBook);
//invoke REST method
using (WebResponse response = request.GetResponse())
{
using (Stream responseStream = response.GetResponseStream())
{
DataContractJsonSerializer serializer = new DataContractJsonSerializer(typeof(IList<Book>));
IList<Book> books = (IList<Book>)serializer.ReadObject(responseStream); // since we get collection back
bindingSource1.DataSource = books;
dvBooks.DataSource = bindingSource1;
}
}
}
catch (Exception ex)
{
}
}
UpdateBook: This is little bit tricky since we need to provide new book that must be updated and added to collection. Please see below code. Using WebClient
private void btnUpdateBook_Click(object sender, EventArgs e)
{
try
{
using(WebClient client = new WebClient())
{
client.Headers[HttpRequestHeader.ContentType] = "text/json";
Uri uri = new Uri(@"http://localhost:8085/BookService/Book");
Book updateBook = new Book() { Id = 3, Name = "UpdateBook Name 3", Price = 77.77f };
MemoryStream requestStream = new MemoryStream();
DataContractJsonSerializer requestSerializer = new DataContractJsonSerializer(typeof(Book));
requestSerializer.WriteObject(requestStream, updateBook);
client.UploadDataCompleted += OnUpdateBookCompleted;
client.UploadDataAsync(uri, "PUT",requestStream.ToArray());
}
}
catch (Exception ex)
{
}
}
void OnUpdateBookCompleted(object sender, UploadDataCompletedEventArgs e)
{
byte[] result = e.Result as byte[];
MemoryStream responseStream = new MemoryStream(result);
DataContractJsonSerializer serializer = new DataContractJsonSerializer(typeof(IList<Book>));
IList<Book> books = (IList<Book>)serializer.ReadObject(responseStream);
bindingSource1.DataSource = books;
dvBooks.DataSource = bindingSource1;
}
For completeness, here is full code for Form1.cs in WindowsClient project
using System;
using System.Collections.Generic;
using System.ComponentModel;
using System.Data;
using System.Drawing;
using System.Linq;
using System.Text;
using System.Threading.Tasks;
using System.Windows.Forms;
using System.Net;
using System.IO;
using System.Xml.XPath;
using System.Xml;
using Data;
using System.Runtime.Serialization.Json;
namespace WindowsClient
{
public partial class Form1 : Form
{
private BindingSource bindingSource1 = new BindingSource();
public Form1()
{
InitializeComponent();
}
//GetBooks : GET
private void btnGetBooks_Click(object sender, EventArgs e)
{
try
{
WebRequest request = WebRequest.Create(@"http://localhost:8085/BookService/Books");
request.Method = "GET";
using (WebResponse response = request.GetResponse())
{
using (Stream responseStream = response.GetResponseStream())
{
DataContractJsonSerializer serializer = new DataContractJsonSerializer(typeof(IList<Book>));
IList<Book> books = (IList<Book>)serializer.ReadObject(responseStream);
bindingSource1.DataSource = books;
dvBooks.DataSource = bindingSource1;
}
}
}
catch (Exception ex)
{
}
}
//GetBook : GET
private void btnGetBook_Click(object sender, EventArgs e)
{
try
{
using(WebClient client = new WebClient())
{
Uri uri = new Uri(@"http://localhost:8085/BookService/Book/2");
client.DownloadDataCompleted += OnGetBookCompleted;
client.DownloadDataAsync(uri);
}
}
catch (Exception ex)
{
}
}
void OnGetBookCompleted(object sender, DownloadDataCompletedEventArgs e)
{
byte[] result = e.Result as byte[];
MemoryStream responseStream = new MemoryStream(result);
DataContractJsonSerializer serializer = new DataContractJsonSerializer(typeof(Book));
Book book = (Book)serializer.ReadObject(responseStream);
bindingSource1.DataSource = book;
dvBooks.DataSource = bindingSource1;
}
private void btnUpdateBook_Click(object sender, EventArgs e)
{
try
{
using(WebClient client = new WebClient())
{
client.Headers[HttpRequestHeader.ContentType] = "text/json";
Uri uri = new Uri(@"http://localhost:8085/BookService/Book");
Book updateBook = new Book() { Id = 3, Name = "UpdateBook Name 3", Price = 77.77f };
MemoryStream requestStream = new MemoryStream();
DataContractJsonSerializer requestSerializer = new DataContractJsonSerializer(typeof(Book));
requestSerializer.WriteObject(requestStream, updateBook);
client.UploadDataCompleted += OnUpdateBookCompleted;
client.UploadDataAsync(uri, "PUT",requestStream.ToArray());
}
}
catch (Exception ex)
{
}
}
void OnUpdateBookCompleted(object sender, UploadDataCompletedEventArgs e)
{
byte[] result = e.Result as byte[];
MemoryStream responseStream = new MemoryStream(result);
DataContractJsonSerializer serializer = new DataContractJsonSerializer(typeof(IList<Book>));
IList<Book> books = (IList<Book>)serializer.ReadObject(responseStream);
bindingSource1.DataSource = books;
dvBooks.DataSource = bindingSource1;
}
private void btnAddBook_Click(object sender, EventArgs e)
{
try
{
Book newBook = new Book() { Id = 0, Name = "New Book", Price = 123.45f };
//create new request
WebRequest request = WebRequest.Create(@"http://localhost:8085/BookService/Book");
request.Method = "POST";
request.ContentType = "application/json; charset=utf-8";
//add new update book info to request
Stream stream = request.GetRequestStream();
DataContractJsonSerializer ser = new DataContractJsonSerializer(typeof(Book));
ser.WriteObject(stream, newBook);
//invoke REST method
using (WebResponse response = request.GetResponse())
{
using (Stream responseStream = response.GetResponseStream())
{
DataContractJsonSerializer serializer = new DataContractJsonSerializer(typeof(IList<Book>));
IList<Book> books = (IList<Book>)serializer.ReadObject(responseStream);
bindingSource1.DataSource = books;
dvBooks.DataSource = bindingSource1;
}
}
}
catch (Exception ex)
{
}
}
private void btnDeleteBook_Click(object sender, EventArgs e)
{
try
{
WebRequest request = WebRequest.Create(@"http://localhost:8085/BookService/Book/2");
request.Method = "DELETE";
//invoke REST method
using (WebResponse response = request.GetResponse())
{
using (Stream responseStream = response.GetResponseStream())
{
DataContractJsonSerializer serializer = new DataContractJsonSerializer(typeof(IList<Book>));
IList<Book> books = (IList<Book>)serializer.ReadObject(responseStream);
bindingSource1.DataSource = books;
dvBooks.DataSource = bindingSource1;
}
}
}
catch (Exception ex)
{
}
}
}
}
That's it. Build your application so that we donot have any errors.
The easiest way to run your application is to do following. Right click on your Solution and go to Properties and select Multiple startup projects and Start WCFSErvice and WindowsClient projects as show below and click Ok.

Now run your application by simply pressing F5 which starts your WCFService and WindowsClient projects and if everything goes fine all the buttons must work like below.
GetBooks:


AddBook:

UpdateBook:

Conclusion:
In this article we learned how to implement a simple RESTful web service using WCF and how we can call all the Restful HTTP methods using HTTP verbs like PUT, POST, GET, DELETE by using a simple windows form client application.
Please feel free to let me know your valuable and constructive comments and suggestions which can help me to make this article better and improve my technical and written skills. Last but not the least please excuse me for my grammar and typos.
Thanks and have a nice and wonderful day.
Subscribe to:
Posts (Atom)