Welcome to my blog. This article describes
1. How we can create a WCF service with NetTcpBinding,
2. How to host a WCF service with NetTcpBinding in IIS
3. How to consume a WCF Service with NetTcpBinding in a console application.
This is just one of the way which I followed in my projects. I am not saying this is the best and it doesnot have cons. My main intension is to share my experience so that it will be useful for the needy. I am new to blogging and I tried to make this post as much interesting as possible. Please excuse me for my grammatical errors and typos. I welcome your constructive comments and suggestions which helps in improving this post and my technical skills.
For this article, I am using the following tools/technologies
Visual Studio 2013
C#
.NET Framework 4.5
IIS ( to host my website)
Windows Server 2008 R2
I always have the habit of creating empty solution first and then work on it. Here also I did same thing. I created a folder called "Blogging" in "D\XXXX\My Programs" folder and created an empty visual studio solution titled "NetTcpBindingDemo"
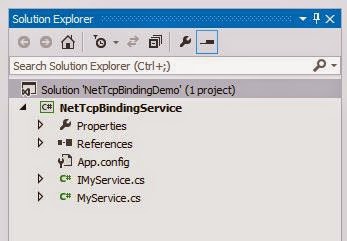
In Solution Explorer , right click on NetTcpBindingDemo and add New Project of type WCF Service Library and name it as "NetTcpBindingService". I deleted all code in IService1.cs and Service1.cs. I renamed IService1.cs to IMyService.cs and Service1.cs to MyService.cs. Please see below for code
IMyService.cs
[ServiceContract]
public interface IMyService
{
[OperationContract]
string GetMessage(string name);
}
MyService.cs
public class MyService : IMyService
{
public string GetMessage(string name)
{
return string.Format("{0} ! Welcome to world of Blogging", name);
}
}
In Solution Explorer , right click on NetTcpBindingDemo and add New Project of type WCF Service Application and name it as "NetTcpBindingServiceHost".
Delete IService1.cs since this will just host NetTcpBindingService.
Delete Service1.svc.cs.
Rename Service1.svc to MyNetTcpService.svc.
Add a reference NetTcpBindingService.dll to NetTcpBindingServiceHost.
Right click on MyNetTcpService and click "View Markup". Delete the code you see and add below code
<%@ ServiceHost Service="NetTcpBindingService.MyService" %>
Open Web.config of NetTcpBindingServiceHost add below inside <system.serviceModel>
<services>
<service name="NetTcpBindingService.MyService"
behaviorConfiguration="ServiceBehavior">
<endpoint address=""
binding="netTcpBinding"
contract="NetTcpBindingService.IMyService"/>
</service>
</services>
<behaviors>
<serviceBehaviors>
<behavior name="ServiceBehavior">
<serviceMetadata httpGetEnabled="true" httpsGetEnabled="true"/>
<serviceDebug includeExceptionDetailInFaults="false"/>
</behavior>
</serviceBehaviors>
</behaviors>

Open IIS and create a new website by Right clicking on Sites and click "Add Web Site..."
Please see below

Right click on BloggingWebsite that you created in above step and click "Add Application.."
I gave physical path to my NetTcpBindingServiceHost location
Please see below

Please see below how my IIS will look

After creating your website and application in IIS you need to enable other protocols for website and applications like nettcp, netmsmq and so on. This can be done in few ways and you can follow any one of the below
Manually editing applicationHost.config:
Open applicationHost.config located at C:\Windows\System32\inetsrv\config in one of the text editor like Notepad. Look for your site in this case site name="BloggingWebsite" make sure you have highlighted sections below
<site name="BloggingWebsite" id="7" serverAutoStart="true">
<application path="/" applicationPool="YourApplicationPool">
<virtualDirectory path="/" physicalPath="D:\XXXX\My Programs\Blogging" />
</application>
<application path="/NetTcpBindingDemoApplication" applicationPool="GopalaApplicationPool" enabledProtocols="http,net.pipe,net.tcp,net.msmq">
<virtualDirectory path="/" physicalPath="D:\XXXX\My Programs\Blogging\NetTcpBindingDemo\NetTcpBindingServiceHost" />
</application>
<bindings>
<binding protocol="http" bindingInformation="*:83:" />
<binding protocol="net.tcp" bindingInformation="838:*" />
<binding protocol="net.pipe" bindingInformation="*" />
<binding protocol="net.msmq" bindingInformation="localhost" />
</bindings>
</site>
Note: Make sure http protocol is always first. This will be helpful if you right click your svc in IIS and click Browse
Using command prompt:
Open command prompt and go to C:\Windows\System32\inetsrv and execute below commands
Note: Please remove white spaces from below commands. I just added them so that they come in one line here.
appcmd.exe set site "BloggingWebsite" -+bindings.[ protocol = ' net.tcp ', bindingInformation ='838:*']
appcmd.exe set site "BloggingWebsite" -+bindings.[protocol='net.pipe',bindingInformation='*']
appcmd.exe set site "BloggingWebsite" -+bindings.[ protocol = ' net.msmq ', bindingInformation = ' localhost ' ]
appcmd.exe set app "BloggingWebsite/NetTcpBindingDemoApplication" /enabledProtocols:http,net.pipe,net.tcp,net.msmq
Using Advanced Settings popup:
Right click on your application in IIS and open "Advanced Settings" under "Manage Applications" and add protocols under Enable Protocols like below


Now if you Browse in IIS it will open up in your default browser. Note down the url. This you will use to add service reference to your client. For me it was
"http://localhost:83/NetTcpBindingDemoApplication/MyNetTcpService.svc"


Now its time to consume our NetTcpBinded WCF service.
Lets use a console application as a client application. The process will be similar for other type of .net applications as clients
Add new console application to NetTcpBindingDemo solution. Name it as "Client"
Add new service reference to your client.
My service is hosted at
"http://localhost:83/NetTcpBindingDemoApplication/MyNetTcpService.svc "

Open app.config and you will see that you will have netTcpBinding under bindings tag and also endpoints will be created under client tag like below
<system.serviceModel>
<bindings>
<netTcpBinding>
<binding name="NetTcpBinding_IMyService" />
</netTcpBinding>
</bindings>
<client>
<endpoint address="net.tcp://myfullcomputername:838/NetTcpBindingDemoApplication/MyNetTcpService.svc"
binding="netTcpBinding" bindingConfiguration="NetTcpBinding_IMyService"
contract="MyServiceReference.IMyService" name="NetTcpBinding_IMyService">
<identity>
<userPrincipalName value="[yourvaule]" />
</identity>
</endpoint>
</client>
</system.serviceModel>
Open Program.cs and write below code in Main method
static void Main(string[] args)
{
MyServiceReference.MyServiceClient client = new MyServiceReference.MyServiceClient("NetTcpBinding_IMyService");
string result = client.GetMessage("Mr Shakespeare");
Console.WriteLine(result);
Console.ReadLine();
}

Conclusion :
In this article we learned how we can create a WCF service with NetTcpBinding and host it in IIS and how we can consume it in our console client. We also learned how we can enable other protocols beside http and https for our websites and applications in IIS.
Please feel free to let me know your valuable and constructive comments and suggestions which can help me to make this article better and improve my technical and written skills. Last but not the least please excuse me for my grammar and typos.
Thanks and have a nice and wonderful day.